


FACE DETECTION Using Haar cascade in C.V.
In previous blog we discussed how Face Identification using Haar cascade classifier works(theory) . In today’s blog we will implement FACE DETECTION Using Haar cascade classifier in PYTHON using OpenCV library and haarcascade_frontalface_default.xml.
PREREQUISITES
1.) Download haarcascade_frontalface_default.xml [from repo link given below]
2.) pip install opencv-python
link to github Repo of my Computer Vision Tutorial
vaibhavhariramani/FaceDetection
Face detection is a computer vision technology that helps to locate/visualize human faces in digital images. This…
vaibhavhariramani/Computer-Vision-Tutorial
You can’t perform that action at this time. You signed in with another tab or window. You signed out in another tab or…
I.) CODE with explanation
I.1. Importing libraries
**import cv2**
I.2. Importing cascade files
The second step simply is to locate the pre-trained weights(cascade file). We will be using default pre-trained models to detect face, eyes and mouth. Depending on your version of Python, the files should be located in :
python3.7/site-packages/cv2/data
otherwise you can get all cascade files from our repo here:
Once identified, we’ll declare Cascade classifiers this way :
cascPath = "haarcascade/haarcascade\_frontalface\_default.xml"
eyePath = "haarcascade/haarcascade\_eye.xml"
smilePath = "haarcascade/haarcascade\_smile.xml" faceCascade = cv2.CascadeClassifier(cascPath)
eyeCascade = cv2.CascadeClassifier(eyePath)
smileCascade = cv2.CascadeClassifier(smilePath)
I.3. Load the image
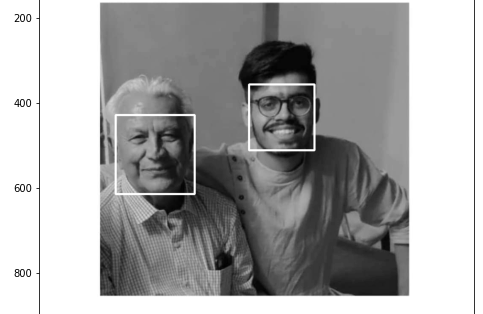
Before implementing the real time face detection algorithm, let’s try a simple version on an image. We can start by loading a test image :
# Load the image
gray = cv2.imread(‘face\_detect\_test.jpeg’, 0)plt.figure(figsize=(12,8))
plt.imshow(gray, cmap=’gray’)
plt.show()
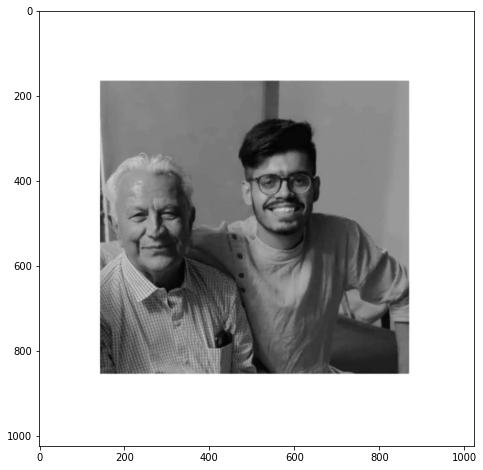
Test image
I.3. Detect face on an image
Now, we detect the face and we add a rectangle around it :
# Detect faces
faces = faceCascade.detectMultiScale(
  gray,
  scaleFactor=1.1,
  minNeighbors=5,
  flags=cv2.CASCADE\_SCALE\_IMAGE
)# For each face
for (x, y, w, h) in faces:
  # Draw rectangle around the face
  cv2.rectangle(gray, (x, y), (x+w, y+h), (255, 255, 255), 3)
Here is a list of the most common parameters of the detectMultiScale function :
- scaleFactor : Parameter specifying how much the image size is reduced at each image scale.
- minNeighbors : Parameter specifying how many neighbors each candidate rectangle should have to retain it.
- minSize : Minimum possible object size. Objects smaller than that are ignored.
- maxSize : Maximum possible object size. Objects larger than that are ignored.
Finally, display the result :
plt.figure(figsize=(12,8))
plt.imshow(gray, cmap=’gray’)
plt.show()
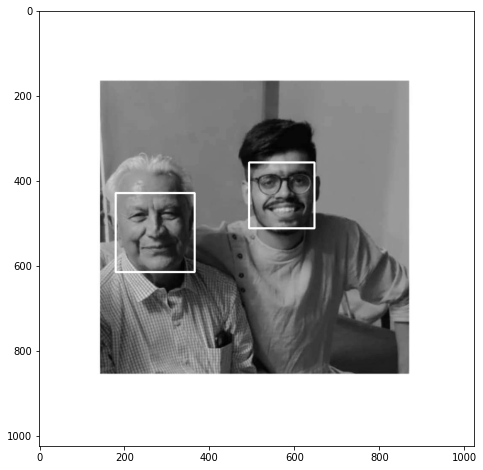
Face detection works well on our test image. Let’s move on to real time now !
I.4. Real time face detection
Let’s move on to the Python implementation of the live facial detection. The first step is to launch the camera, and capture the video. Then, we’ll transform the image to a gray scale image. This is used to reduce the dimension of the input image. Indeed, instead of 3 points per pixel describing Red, Green, Blue, we apply a simple linear transformation :

This is implemented by default in OpenCV.
video_capture = cv2.VideoCapture(0)while True:
  # Capture frame-by-frame
  ret, frame = video\_capture.read()
  gray = cv2.cvtColor(frame, cv2.COLOR\_BGR2GRAY)
Now, we’ll use the faceCascade variable define above, which contains a pre-trained algorithm, and apply it to the gray scale image.
faces = faceCascade.detectMultiScale(
  gray,
  scaleFactor=1.1,
  minNeighbors=5,
  minSize=(30, 30),
  flags=cv2.CASCADE\_SCALE\_IMAGE
)
For each face detected, we’ll draw a rectangle around the face :
for (x, y, w, h) in faces:
  if w > 250 :
    cv2.rectangle(frame, (x, y), (x+w, y+h), (255, 0, 0), 3)
    roi_gray = gray[y:y+h, x:x+w]
    roi_color = frame[y:y+h, x:x+w]
For each mouth detected, draw a rectangle around it :
smile = smileCascade.detectMultiScale(
  roi_gray,
  scaleFactor= 1.16,
  minNeighbors=35,
  minSize=(25, 25),
  flags=cv2.CASCADE_SCALE_IMAGE
)
for (sx, sy, sw, sh) in smile:
  cv2.rectangle(roi_color, (sh, sy), (sx+sw, sy+sh), (255, 0, 0), 2)
  cv2.putText(frame,’Smile’,(x + sx,y + sy), 1, 1, (0, 255, 0), 1)
For each eye detected, draw a rectangle around it :
eyes = eyeCascade.detectMultiScale(roi_gray)
for (ex,ey,ew,eh) in eyes:
  cv2.rectangle(roi_color,(ex,ey),(ex+ew,ey+eh),(0,255,0),2)
  cv2.putText(frame,’Eye’,(x + ex,y + ey), 1, 1, (0, 255, 0), 1)
Then, count the total number of faces, and display the overall image :
cv2.putText(frame,’Number of Faces : ‘ + str(len(faces)),(40, 40), font, 1,(255,0,0),2)
# Display the resulting frame
cv2.imshow(‘Video’, frame)
And implement an exit option when we want to stop the camera by pressing q :
if cv2.waitKey(1) & 0xFF == ord(‘q’):
  break
Finally, when everything is done, release the capture and destroy all windows. There are some troubles killing windows on Mac which might require killing Python from the Activity Manager later on.
video_capture.release()
cv2.destroyAllWindows()
I.5. Wrapping it up
I.6. Results
I will made a quick YouTube illustration of the face detection algorithm.
GEEKY BAWA
just a silly Geek who love to seek out new technologies and experience cool stuff.
Do Checkout My other Blogs
GEEKY TRAVELLER - Face Detection
Then, we apply this rectangle as a convolutional kernel, over our whole image. In order to be exhaustive, we should…
face-detection-using-haar-cascade-theory/
Vaibhav’s Blog
A site for Machine Learning Tutorials and Articles
Do Checkout My Youtube channel
GHUMMAKKAD BAWA
Hi, There i am Vaibhav Hariramani a Tech and Travel Blogger always in search of cheap food with great taste and great…
GEEKY BAWA
Hi there! I am VAIBHAV HARIRAMANI (AKA GEEKY BAWA) Tech blogger who love to seek out new technologies and experience…
Made with ❤️by Vaibhav Hariramani
- If you enjoyed this, follow me on Medium for more
- Follow me on Kaggle for more content!
- Let’s connect on LinkedIn
- Interested in collaborating?
- Check out my website.
- Check out my website.
Don’t forget to tag us
if you use this repo in your project don’t forget to mention us as Contributer in it . And Don’t forget to tag us Linkedin, instagram, facebook , twitter, Github
More Resources
To learn more about these Resources you can Refer to some of these articles written by Me:-
Download THE VAIBHAV HARIRAMANI APP

 The Vaibhav Hariramani App (Latest Version)
Download THE VAIBHAV HARIRAMANI APP consist of Tutorials,Projects,Blogs and Vlogs of our Site developed Using Android Studio with Web View try installing it in your android device.
Follow me
Happy coding ❤️ .